
Nothing screams summer like tie- dye. Tie Dying was one of those activities that I loved doing as a kid. It’s super mess and super fun. It was always something we did at camp. However, at camp, we had every color under the sun to choose from to tie dye our t-shirts.
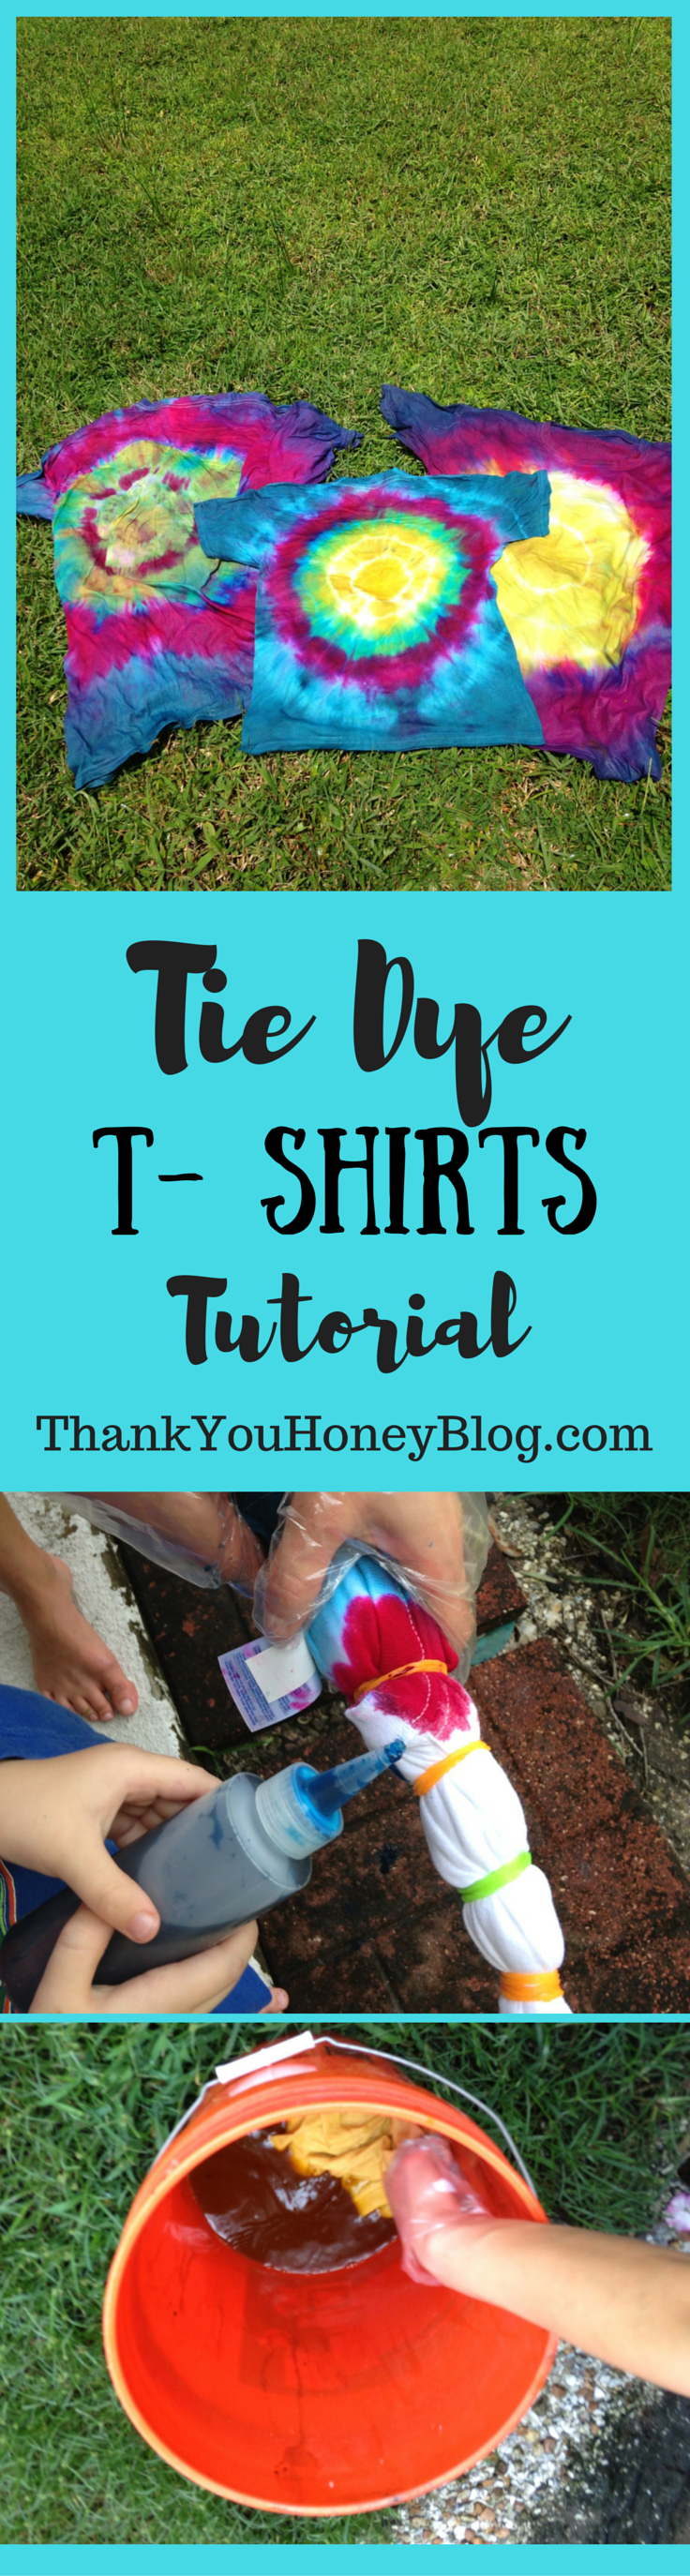
Tie Dye T-Shirts Tutorial
What you need:
4 different color Rit Dye (I used blue, green, yellow, and red)
Plain white tee-shirts
Rubber bands
2 buckets
2 squeeze bottles
How To:
- Follow directions on the box of Rit dye for preparing the dye. (I put the darker colors in the squeeze bottles &, the lighter colors in the bucket.)
- Twist, tie, bunch, however, you like your tee-shirt and hold together with rubber bands.
- Make sure you wear clothes you don’t care about because the die doesn’t come out.
- Dip the t-shirt into lighter colors first.
- Then squeeze darker colors on the t-shirt with the squeeze bottles.
- After you have finished tie-dying t- shirts let the shirts sit with the dye on for 1 hour.
- Then, rinse t-shirt with cold water till water runs clear.
- Let the t-shirts air dry.
- Then, wash the tie- dye t- shirts in the washer machine in cold water on the gentle cycle with laundry soap.
- Remove the t- shirts from the washer machine and hang them to air dry.
- Wash out the washer machine with bleach.
Voila! Tie Dye Tee-shirts!
Remember to sign up for our newsletter, so you never miss one of our many adventures and follow Thank You Honey on Facebook, Twitter, Pinterest, & Instagram!